A projector is necessary for a church. See why if you are wondering. Well, setting the church projector is easy, but a lengthy affair and you will have to keep all your tools ready before commencing the setup process. Along with all the equipment, you should assess the area accurately where you want to install the projector so that it can offer the best view. It would be a smart move to think it through because once you make a permanent installation, then there is no going back. So first you should arrange all the necessary equipment.
TABLE OF CONTENTS
List of necessary equipment:
Projector
The projector you will choose for your church should be capable enough to offer an excellent image quality at any light condition. Most importantly it should have high lumens and a large screen size range. You can follow our other article regarding church projector where we have discussed how you can find the best projector for churches.
Screen
Get a proper retractable or motorized screen, entirely depending upon your budget. But it should offer good gain and a large screen size range. We have a guide on the projector screen too. You may check it out.
Cables
For cables, you need a long HDMI cable, HDMI to RG-6 cable (for emergency), adapter, splitter, audio cable, and USB cable.
Video Source
Whether you are using a PC, Mac, laptop, smartphone, or tablet, it entirely depends upon you.
Tools
You should arrange firsthand all the necessary installation tools so that you won’t have to go to the shop in the middle of the setup.
So let’s start with the process;
Preparing the Location For Setup

The crucial step before installing a projector in the church is to find the right location which would offer the best view to everyone. If you are looking for a center view where everyone can get a proper view, then mounting the projector in the middle of the church would be a plausible solution. However if your primary target is Sunday school or general services, then set it in a convenient room or separate corner of the church.
For small areas, you don’t have to mount it as you can just place it in a stool or furniture. But if you are putting it in a large location, then we would recommend you for mounting the projector with the roof.
However, you can also use pillars or walls to mount the projector because it will keep the projector out of the way of church members. Try to place it in such a way that it can offer proper projection without distracting anyone. So after finding the right location, now it is time to accurately measure the distance between the intended projector’s place and the screen’s place which will give you the throw distance.
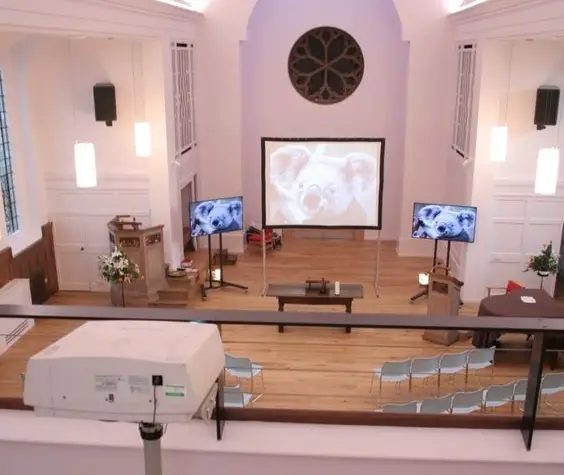
Setting The Screen At Right Place
After finalizing the location, now comes the step where you will have to set up the screen. It is used best to use a retractable or motorized mountable screen as a screen with a stand won’t be a good idea. However, if you have ample space for installation, then you can comfortably use a screen with stands.
You can use ropes or screen mounting brackets to install the projector at the predetermined place. You can consult with the church head before commencing screen set up so that it doesn’t obstruct anything of religious importance. To set up the projector in the outdoor of the church, we would suggest you use a standing or inflatable screen as it would offer a massive screen size.
You can also use a wall mount screen if you are planning to install the projector in the interior of the church, but you will need a minimum 100inch wall space. For wall setup, use a drill machine to make a hole and then hang the screen using a hook. Wherever you install, make sure it offers a center and an unobstructed view to the intended church members.
Installing the Projector
Mounting the projector is probably the most crucial part of this process, so you stay alert while setting it. So first you have to measure the throw distance of the projector and depending on that you have to place the projector. If you have a very small portion of the church to set up the projector, you may choose a very good short throw projector instead of a general projector.
If you are opting for a ceiling mount, then using measuring tape you have to mark a point on the ceiling (wall and pillar is also applicable) where you will have to place the projector. Then you will have to install the ceiling bracket on the given point.
You can either do it by yourself or ask an expert to complete that part of the installation for you. Then using the mounting bracket of the projector, you will have to attach the projector with the ceiling bracket. You should direct the lens of the angle properly so that the projection light covers the entire screen.
For convenience or to avoid any mishap in the church, you can even opt for rear projection, and the process of installation is almost the same. However, if you are installing it in a small area with a small crowd, then the front projection is a better option. Depending upon the throw distance, you just have to place the projector on a stool or table for projection. The lens should be in the middle of the screen and a little upright.
Cable Connection
Well, you are almost at the end of the whole setup process, and now you will have to hook all the required cables before switching on the device. First and foremost you need to plug the power cable, and you can either do it directly or use an extension cable for connection. After connecting it to the power source, you will have to hook it with the video source using any designated cable (commonly HDMI cable).
You can even connect the video source through the Wi-Fi or Bluetooth facility of the projector. Apart from these, you can use YouTube, Chrome Cast, Airplay, etc to play videos directly through the projector but you will need to connect the projector with the Wi-Fi.
Image Placement And Adjustment
Now after connecting all the cables, it is time to switch on all the devices and project a blank or test pattern image on the screen. You can either inbuilt test pattern image or download a picture to fit the whole projection on the screen properly. There are chances that you will find gaps on the screen so you can use zoom, height adjustment, or lens shift facility to correct it.
In addition to placement, you also need to adjust the picture quality so that every church member can get the best visual. To tune the overall quality, you need to adjust the picture as projectors come with stock presets for images. Then use the focus ring to drive away any clarity issue from the image. You can also utilize its keystone correction for any further adjustment. So after image adjustment, you are almost complete, and you will have one last job to finish which audio setup.
Audio Setup
In most cases, projectors come with an inbuilt speaker, but you will need an external speaker to cater to a large crowd in the church. Moreover, churches are big, and standard inbuilt speakers won’t offer the required quality and volume. We would recommend you to use large speakers with the projector so that everyone in the church can adequately hear the sound. However, if you will use the projector for a small crowd or classes, then getting a decent 2.1 speaker will get the job done.


